Pages

Stay Connected

Showing posts with label Under 400 Calories. Show all posts

Wednesday, January 22, 2014

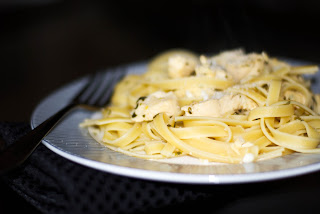
Gluten Free Lemon Chicken Spinach Pasta


My family and I do not suffer from Celiac Disease; nor do we follow a Gluten Free Diet. However, I wanted to try gluten free pasta in a recipe to see if there was a difference as we may have wheat allergies; which causes that bloated feeling after eating wheat products found in pasta and bread.

I have to say that not only was this recipe for Gluten Free Lemon Chicken Spinach Pasta delicious, we also all felt great after eating it. The meal was very satisfying and I loved the lemony flavor combined with the grilled chicken and fresh spinach. I did find that the more you stirred the pasta, the noodles broke apart easier and didn't hold their shape like regular pasta, but that could have just been the brand I used. This is a fantastic meal to make during the week and to even speed up your food prep, I would grill your chicken the night before. ~Enjoy!


Monday, January 20, 2014

Pork Milanese


Today we honor Dr. Martin Luther King Jr. He once said, "Life's most persistent and urgent question is: 'What are you doing for others?'" . Today, whether  you choose to reflect on the many wonderful changes this man brought to our country or setting out actively to make a difference, I hope you enjoy your day. And now for today's new recipe, Pork Milanese.

Friday, January 10, 2014

50 Main Entrees Under 400 Calories


If you're like the millions of people that start each new year with a resolution to loose weight or eat healthier, most find it difficult after time to find new recipes to help keep you reaching your goal.

To help with your goals (and mine!), I've compiled a list of 50 Main Entree Recipes that I have created all Under 400 Calories. All calculations are based on ingredients entered into CalorieCount and may not be 100% accurate because of the specific brands I've used, but it will give you a good starting point. I've broken the recipes out into sections: Poultry, Beef, Pork & Pasta and NonMeat. Click on the recipe name to be taken to each individual recipe post.  ~Enjoy and Good Luck with your New Year's Goals! 

Thursday, January 9, 2014

Herbs de Provence Encrusted Pork Loin with Chardonnay Pan Gravy


Herbs de Provence is a mixture of dried herbs containing savory, marjoram, rosemary, thyme, oregano and lavender. If you've been a CEK reader for a while, you also know that I generally don't use many dried herbs in my cooking. However, when I saw this package of herbs while out shopping recently, I had always wanted to try it. After all, they did contain many of the same flavors I love to cook with.

Monday, December 9, 2013

Blueberry Almond Crumb Cake


Are you ready for the EASIEST dessert you're ever going to make? This Blueberry Crumb Cake is it! Five (YES 5!) ingredients and less than one hour of your time are all you need to make this scrumptious dessert.

Wednesday, October 9, 2013

Under 400 Calories: Main Entrees eCookbook


The next installment in my eCookbook series is finished!

If you're watching your caloric intake like I am, then this compilation of recipes is for you. This 59 page downloadable eBook contains 50 recipes featuring poultry, beef, pork, pasta and non meat entrees; all under 400 calories to help ease your daily menu planning. Each recipe also comes with nutritional information such as calories, fat, carbohydrates, sugar and fiber calculated by Calorie Count based on the ingredients I have used in creating each dish. 

Head over to the eStore Tab and download your copy of Under 400 Calories: Main Entrees or the Desserts book today!


Wednesday, September 25, 2013

Tomato Gratin

If you or someone you know has a garden, then I'm sure you have been or will about to be inundated with tomatoes. September is the "last hurrah" of tomato season here in NJ and every year, my in laws grow more tomatoes than they know what to do with. Lucky for me, I get them to experiment and cook with their overabundance. Some recipes I create are healthy. Others not so much. I guess I'm just having one of those "I don't care what I eat" weeks after yesterday's Beef Stroganoff. Anyway, this recipe for Tomato Gratin certainly falls into this category, but man is it worth it! 

Tomato Gratin
Prep Time: 10 minutes  Cook Time: 25 minutes  Total Time: 35 minutes    Serves: 6

Ingredients

  • 6 Large Roma Tomatoes, sliced 1/4" thick
  • 2 Garlic Cloves, minced
  • 2 tbsp. Extra Virgin Olive Oil
  • 1 c. Asiago Cheese, shredded
  • 1/4 c. Fresh Basil, chopped
  • 1 c. Italian Flavored Breadcrumbs
  • 3 tbsp. Butter, melted
Directions
  1. Preheat oven to 350 degrees. 
  2. Layer tomatoes in an 8"x8" oven safe baking dish; then top with garlic and drizzle with oil. Bake for 10 minutes and remove from oven. 
  3. In a small bowl, combine the cheese basil, breadcrumbs and butter. Mix until it is crumbly; then sprinkle on top of the tomatoes. 
  4. Place the dish back in the oven and bake for an additional 15 minutes, until the breadcrumbs are lightly browned. 
Enjoy! 


Nutrition Facts
Calories 340, Carbs 19.4g, Fat 23g, Protein 11.3g, Fiber 2.1g, Sugar 1.3g
*Calculations based on ingredients entered into Calorie Count and may not be 100% accurate. 

Tomato Gratin Shopping List

Wednesday, July 24, 2013

Pasta e Ceci (Ditalini with Chick Peas)

Pasta e Ceci or pasta with beans, was considered a "poor man's meal" in Italy as it combined simple, bountiful ingredients. To me, this dish was exquisite, filling and packed with aromatic flavors. I REALLY wish I had made a double batch of this recipe, it was THAT good!

Unfortunately, I only got to taste a few spoonfuls since the entire batch was made to be split between my hubby and daughter for their dinner since they would be working late this particular evening. I literally picked up my daughter from cheering practice, made this recipe and photographed it in the time it took her to shower and get ready for work.

Pasta e Ceci is such a simple, quick recipe to prepare and you can substitute vegetable broth if you follow a vegetarian diet. My daughter wound up eating this in the car on her way to the office instead of waiting to eat it for dinner because it smelled so good and she couldn't resist. Now they can't wait for me to make this recipe again!


Pasta e Ceci (Ditalini with Chick Peas)
Prep Time: 10 minutes                   Yield: 3
Cook Time: 20 minutes                  Servings: 1 cup
Total Time: 30 minutes
Ingredients

  • 1 tbsp. Extra Virgin Olive Oil
  • 1/4 c. Red Onion, chopped
  • 1/4 c. Celery, chopped
  • 2 Cloves Garlic, chopped
  • 1 15-ounce Can Chick Peas, rinsed
  • 1/4 c. Crushed Tomatoes (I used San Marzano)
  • 2 tsp. Fresh Parsley, chopped
  • 2 tsp. Fresh Rosemary, chopped
  • 2 c. Low Sodium/Fat Free Chicken Broth
  • 1 c. Ditalini Pasta, dry (I used Barilla)
  • 1/4 c. Asiago Cheese, shredded
  • Kosher Salt, to taste
  • Fresh Ground Black Pepper, to taste

Directions

  1. Heat oil in a medium saucepan over medium heat and add in the onion, celery, and garlic. Saute for 3-5 minutes allowing the vegetables to soften. 
  2. Pulse 1 cup of the chick peas in a mini food processor or blender; then add them to the saucepan along with the remaining whole chick peas, tomatoes, parsley, rosemary, chicken broth and pasta. 
  3. Allow to simmer for 15-20 minutes, then add in the cheese and season with salt and pepper.
Enjoy! 


Nutrition Facts
Calories 399 , Carbs 64.1g, Fat 9.4g, Protein 15.6g, Fiber 7.5g, Sugar 4.2g
*Calculations based on ingredients entered into Calorie Count and may not be 100% accurate.


Wednesday, June 12, 2013

Low-Fat Vegetable Lasagna

Yes. I am half Italian; however, I was never a big fan of ricotta cheese, which is why I don't make lasagna, baked ziti or ravioli all that often. But a while back, I made Low Fat Black Bean and Sun Dried Tomato Lasagna using cottage cheese and I LOVED it! So it prompted me to find other ways to make this recipe as well. 

I was about to leave for vacation and I had some zucchini and cottage cheese I needed to use up before I left so I whipped up a batch of this Low Fat Vegetable Lasagna. It was incredible and I really liked how it wasn't "mushy" with cheese in between the layers like a regular lasagna usually is. I happened to use the regular lasagna sheets that had to be boiled, simply because the store I was in at the time didn't happen to have the no-boil sheets which I prefer using. If you can find them, it would shave off some cooking time. Just layer the sheets like you normally would without cooking the noodles first. 

Low-Fat Vegetable Lasagna
Prep Time:  20 minutes                        Yield: 12
Cook Time:  45 minutes                        Serving: 1 piece
Total Time:  65 minutes


Ingredients

  • 1 box Barilla Lasagna Sheets
  • 1lb. 2% Cottage Cheese
  • 2 c. Reduced Fat Mozzarella Cheese, shredded
  • 1 Egg
  • 2 tbsp. Fresh Parsley
  • 2 c. Zucchini, shredded
  • 2 c. Frozen Chopped Spinach, defrosted and drained
  • 1 c. Carrots, shredded
  • 2-28 oz. Cans Crushed Tomatoes with Basil
Directions
  1. Bring a large pot of water to a boil, add some salt and cook the lasagna sheets until they are al dente. Drain the water. 
  2. In a large bowl, combine the cottage cheese, 1 c. mozzarella cheese, egg, 1 tbsp. parsley, zucchini, spinach, carrots and 1 can of the crushed tomatoes. Mix well. 
  3. Preheat oven to 350 degrees. 
  4. Using a 9"x13" oven safe dish, ladle a thin layer of the crushed tomatoes on the bottom, place 5 lasagna sheets on top of the sauce; then spread the vegetable mixture on top of the noodles. Continue layering four times until the top layer contains only the lasagna sheets. 
  5. Add a layer of the crushed tomatoes; then sprinkle with the remaining 1 c. of mozzarella cheese and 1 tbsp. parsley. 
  6. Bake for 45 minutes; then remove from oven and allow to cool 10 minutes; then cut into 12 pieces.  
Nutrition Facts
Calories 302, Carbs 46.5g, Fat 5.1g, Protein 19.5g, Fiber 6.2 g, Sugar 6.6g

*Calculations based on ingredients entered into Calorie Count and may not be 100% accurate. 

Enjoy! 

Wednesday, April 17, 2013

Chicken Scampi over Fettuccine

Last week, I had taken chicken out to make a new dish, but as the day progressed I really wasn't in the mood to cook...GASP! So I decided to make this quick and easy Chicken Scampi over Fettuccine instead. You all know I don't eat shrimp, but the rest of my family loves it. I make it for them on occasion and when I do I generally make a chicken version for me; similar to this one. It was delicious and ready in under 30 minutes. Now that's my kind of meal! 


Chicken Scampi over Fettuccine
5-3oz. Chicken Tenders, raw
1 tbsp. Extra Virgin Olive Oil
1 tbsp. Butter
3 Garlic Cloves
1/3 c. Vermouth
1 tsp. Lemon Zest
1tbsp. Parsley
1/2 c. Low-Sodium Chicken Broth
2 tbsp. Pecorino Romano Cheese
1 lb. Fettuccine

Directions:
1. Cook pasta according to package directions; drain. 
2. While the pasta is cooking, cut the chicken into bite sized pieces. Heat the oil in Dutch oven or large pot, then add in the chicken. Cook until the chicken is no longer pink; approximately 5-8 minutes. 
3. Next, add the butter and garlic and saute for 1 minute; then add in the vermouth, lemon zest, parsley, chicken broth and cheese. Allow to simmer for 3-5 minutes. If the sauce is done before the pasta, turn off the heat. 
4. Add the cooked pasta to the sauce and mix well. Serves 6. 


*Nutritional Information per Serving: Calories 351, Carbs 50.5g, Fat 4.7g, Protein 22.8g, Fiber 2.4g, Sugar 1.2g
*Calculations based on ingredients entered into Calorie Count and may not be 100% accurate.

Enjoy!

Thursday, April 11, 2013

Chourico & Spinach White Bean Stew

I have mentioned before that my father in-law is Portuguese and until I met and married my husband over 20 years ago, I never even heard of chourico, let alone cooked with it. So when I saw a similar recipe in Bon Appetit Magazine a couple of months ago, I knew I wanted to give it a try. Of course I changed it around a little bit to suit our liking, but this dish was fantastic! 

The only suggestion I would make would be to watch what type of chourico you purchase because they are different and depending on the brand or type you purchase, the meat could either be more smokey tasting and the consistency of the sausage might not be as firm as others. Our family prefers the Portuguese chourico, but when not available locally, I usually purchase the long, thin Spanish variety.  

Here are three different types: 
  1. Portuguese chourico is made with pork, fat, wine, paprika and salt. It is then stuffed into natural or artificial casings and slowly dried over smoke.They are available in sweet and hot varieties. 
  2. Spanish chorizo is made from coarsely chopped pork and pork fat and is seasoned with smoked paprika and salt. You can purchase it spicy or sweet depending on the type of smoked paprika used. Chorizo comes in short, long, hard and soft varieties. In general, long, thin chorizos are sweet, and short chorizos are spicy.
  3. The Mexican versions of chorizo are made from fatty pork and the meat is usually ground rather than chopped, and different seasonings are used.
My husband really liked this dish and can't wait for me to make it again. However, my father in-law and I thought the particular brand of sausage I used was a little too smokey, though the dish as a whole was good so I'll have to make it again with a different brand. He's going in for heart valve replacement surgery next month so I'll have to make him a batch of this to enjoy when he's on the mend. 

 Chourico & Spinach White Bean Stew
Adapted from Bon Appetit
6 oz. Chorizo
2 Garlic Cloves, chopped
1/4 c. Red Onion, chopped
1 tbsp. Extra Virgin Olive Oil
2 c. Fresh Spinach, stems removed, rinsed and packed
19oz. Cannellini Beans, rinsed and drained
1 1/2 c. Low-Sodium/Fat Free Chicken Broth
1/4 c. Pecorino Romano Cheese, grated
Kosher Salt, to taste
Fresh Ground Black Pepper, to taste

Directions: 
1. Peel skin from chorizo, then chop into bite sized pieces. 
2. Heat the oil in a Dutch oven (or large pot) over medium heat; then add the chorizo, garlic and onions. Cook for approximately 5-6 minutes. 
3. Next, add in the spinach and stir until it has wilted; then add in the beans. Smash half of the beans with the back of a wooden spoon as this will help thicken the stew; then add the chicken broth and cheese. 
4. Allow to simmer for 10-15 minutes; then season with salt and pepper. Makes 3 cups. 


*Nutritional Information per Cup: Calories 318, Carbs 29.8g, Fat 15.8g, Protein 22.3g, Fiber 10.9g, Sugar 1.3g
*Calculations based on ingredients entered into Calorie Count and may not be 100% accurate.

Enjoy! 


Shared at Thursday's Treasures 4/11/13

Monday, March 25, 2013

Creamy Rigatoni with Portobello Mushrooms and Spinach

Are you looking for a quick and easy weeknight meal? Whether it's for Meatless Monday, Friday during Lent or any night in between, this meatless recipe for Creamy Rigatoni with Portobello Mushrooms and Spinach is perfect! 

Cream cheese adds a wonderful, creamy texture and flavor when mixed with fresh garlic, spinach and Portobello mushrooms and your family will love it. I served mine with a tossed salad and it even reheated beautifully when I had to take this one on-the-go for Rachael's dinner. If you like your food a little on the spicier side, add more crushed red pepper. 


Creamy Rigatoni with Portobello Mushrooms & Spinach
1 lb. Rigatoni Pasta
1 tbsp. Extra Virgin Olive Oil
1 Portobello Mushroom Cap, diced
2 Garlic Cloves, chopped
1/2 c. Frozen Chopped Spinach, defrosted
4 oz. Light Cream Cheese
1/2 c. Pasta Water
1/2 c. Pecorino Romano Cheese, shredded
1 tsp. Crushed Red Pepper
Kosher Salt, to taste

Directions:
1. Cook pasta according to package directions; drain all water except for 1/2 cup. 
2. While the pasta is cooking, heat the oil in a large saute pan and add the mushrooms and garlic. 
3. Saute until the mushrooms start to soften; then add in the spinach, cream cheese, pasta water, Pecorino Romano cheese, and red pepper. 
4. Add in the cooked pasta and mix until well blended. Serves 6. 
*Nutritional Information per Serving: Calories 382, Carbs 53.5g, Fat 12.4g, Protein 16.3g, Fiber 3.2g, Sugar 3.7g
*Calculations based on ingredients entered into CalorieCount and may not be 100% accurate.

On another note, Happy Anniversary to my hubby of 18 years!  I love you and the life we've made together and would do it all over again and again. It hasn't always been easy, but I wouldn't change a thing. xo  

Tuesday, March 19, 2013

Buttermilk Fried Chicken

I want to see a raise of hands. Who has buttermilk all year round in their refrigerator? I certainly don't, but thanks to this tip I learned a few years ago, it's not a problem! Simply mix together 1 cup of milk + the juice of one lemon + 5 minutes to rest = Buttermilk. That's it...Easy Peasy! It will get thick just like the buttermilk you buy at the store. 

One morning while asking the kids what they wanted for dinner, Gab stated she wanted fried chicken on the bone, like the kind you can get at KFC. Now, I can probably count on one hand the number of times I've eaten at a KFC in the last 20 years, let alone make chicken at home that way. There aren't many foods I deep fry with the exception of chicken/pork/eggplant cutlets and homemade french fries. I never even owned a fry daddy; well until I won a REALLY small one at a tricky tray recently! But it was a dreary kind of day and I did have some chicken thighs in the freezer so I figured why not.  

I soaked the chicken for about 2 hours in the buttermilk before coating and frying them. I also used my Dutch oven to fry the pieces and worked in two batches. After I was done frying, I also put them in the oven just to make sure they were cooked (as I have a real fetish about making sure my chicken is fully cooked). I can't compare these entirely to KFC; however, they were delicious and crunchy just how I remembered them and the kids loved them! 


Buttermilk Fried Chicken
2 c. Buttermilk (I used 2c. 2% milk + fresh juice of 2 lemons)
8 Chicken Thighs (You can also use chicken breasts and legs)
2 c. All-Purpose Flour
1 tsp. Kosher Salt
1/2 tsp. Fresh Ground Black Pepper
1 tsp. Paprika
1 tsp. Onion Powder
1 tsp. Garlic Powder
1 tsp. Dry Mustard
2 tsp. Fresh Thyme
Extra Virgin Olive Oil, for frying


Directions:
1. Rinse the chicken under cold water and pat dry with paper towels. 
2. Add the chicken to a resealable plastic bag along with the buttermilk and refrigerate for at least 2 hours (you can leave them there all day if you'd like). Remove the chicken from the refrigerator 10 minutes before you're ready to fry. 
3. Prepare the coating mixture by mixing together the flour, salt, pepper, onion powder, garlic powder, dry mustard and thyme. 
4. Pour the oil into a large pot, Dutch oven or deep fryer and allow to heat over medium-high heat. 
5. Coat the chicken one piece at a time by dredging it into the flour mixture; then add the chicken to the oil. (You may have to work in two batches to avoid overcrowding). 
6. Fry the chicken 7-8 minutes per side; allowing them to turn golden brown. 
7. Drain the chicken on paper towels; then place on a baking sheet lined with a rack or foil. 
8. Bake the chicken at 350 degrees for 10-15 minutes or until the chicken has reached proper internal temperature. Makes 8 pieces. 

Now the nutritional value on this one was a little tricky to figure out due to the frying aspect. I calculated this recipe using 1/2 cup of extra virgin olive oil; which was based on how much oil was left after frying so this is just to give you an idea. It's fried=not real healthy! :)

*Nutritional Information per Piece: Calories 397, Carbs 25.8g, Fat 24.1g, Protein 20.7g, Fiber 1.2g, Sugar 4.3g
*Calculations based on ingredients entered into CalorieCount and may not be 100% accurate.

BTW, today also happens to be National Poultry Day. If you're looking for more dinner inspiration, here are the Top 5 Main Entree Poultry recipes based on page views to date on the blog. Click on the name to be taken to the original recipe! 


Enjoy! 


Wednesday, March 13, 2013

Chocolate Chip Cranberry Oat Muffins (Guest Post-Chocolate, Chocolate and More)

Today, I'm excited to have Joan Hayes from Chocolate, Chocolate and More back here at Carrie's Experimental Kitchen as a Guest Blogger. I've known Joan for quite some time now through our foodie world and she is such an amazing person, besides being one of the most talented bakers I have had the pleasure to get to know. Last July, she sparked a ton of interest with her recipe for Cinnamon Swirl Bread (which my family LOVES!) and today she is going to share her recipe for these Chocolate Chip Cranberry Oat Muffins.  Do you see the drool running down my face???!!!

Take it away Joan!


Hi all, I'm Joan and I blog over at Chocolate Chocolate and more. I live in small town Georgia and love being able to stay at home, volunteer at my children's schools and have dinner on the table most nights for us to all sit down and review our days together. It's getting a little harder each year as the kids get older and have more activities dragging them in different directions but dinner is still a special time in our house and for that I'm thankful.

I'm so happy to be guest posting for Carrie. She was one of my very first bloggy friends and has always been so supportive of everyone she comes in contact with. I love all her recipes and her cookbook is amazing. I was thrilled when Carrie sent me my copy and I've got so many pages dog-eared with recipes I want to try.

I'm mainly a sweets maker, although I also love making breads. There's just something about kneading dough by hand that I find therapeutic.  As you can tell by the name of my blog, I do have a special affection for chocolate. If I could live off of chocolate alone, I think I would. Sadly I can't and there are so many other wonderful treats out there to bake up. Variety is the spice of life right?

Muffins are one of our favorite breakfast foods. Since I'm not a morning person, I love that I can make muffins, pop them in the freezer and then the kids can grab one or two before school. Just put them in the microwave for about 30-45 seconds and it's just like they came out of the oven.


Chocolate Chip Cranberry Oat Muffins

1 1/4 cup flour
1 cup quick oatmeal
3/4 cup brown sugar
1 1/2 teaspoons baking powder
1/2 teaspoon salt
1 large egg
3/4 cup buttermilk
1/2 cup oil (I used vegetable)
3/4 cup dried cranberries
3/4 cup bittersweet chocolate chips

Directions:
1. Combine flour, oatmeal, sugar, baking powder and salt in a medium bowl.
2. In a separate bowl, beat egg and add buttermilk and oil, beat again to combine. Stir in buttermilk mixture to dry ingredients until completely moist.
3. Fold in chocolate and cranberries.
4. Spoon into 12 paper lined muffin tins and bake in a 400 degree oven for about 20 minutes, just until tops begin to golden.
5. Remove from oven and let rest for 5 minutes. Serve warm or store in airtight container once completely cooled.

*Nutritional Information per Muffin: Calories 302, Carbs 43.7g, Fat 13.9g, Protein 3.1g, Fiber 2.4g, Sugar 27.6g
*Calculations based on ingredients entered into CalorieCount and may not be 100% accurate.


You can find me on Facebook, Pinterest, Twitter and Google +

Thank you for another incredible recipe Joan! My kids are literally looking over my shoulder begging me to get up from this computer and make them...NOW! :)

If you like what you saw here today, she has plenty more where that came from! Please visit her website or head over to VoiceBoks, where Joan was nominated for one of the Top 10 Food Blogs and cast your vote!

Enjoy!


ShareThis